How to Migrate VMs from VMware to Proxmox VE?
-
 Last updated: 07 March 2025
-
 Cloud Migration
 -
 Written by
Editorial Team
Written by
Editorial Team
The global digital environment is one that sees constant flux. Amid all this chaos, companies are continually on the lookout for better, faster, and cheaper tools to propel their business forward. If you are managing a virtualized environment, you know that choosing the right platform is crucial for both performance and cost efficiency.
VMware has been a leading player in the virtualization space for years, but with Proxmox Virtual Environment (Proxmox VE) offering a robust, open-source alternative, many IT professionals are contemplating a switch. By leveraging the latter’s integrated tools and support for both KVM-based virtualization and containers, businesses can enhance scalability, reduce licensing costs, and tailor their virtual environment to better meet evolving IT needs. In this blog post, we will walk you through the entire process of migrating from VMware to Proxmox VE, covering everything from initial planning to final implementation.
Why Migrate from VMware to Proxmox VE?
Although VMware has set the industry standard for hypervisors, companies are beginning to shift away from it. The prime reason was the discontinuation of the free ESXi Hypervisor following Broadcom’s VMware acquisition. This shift in policy has encouraged small and medium business owners to find alternatives, with many opting for Proxmox. One-on-one comparison between the two shows us why these businesses are making the shift.
- Cost Efficient: Proxmox VE is open-source and free to use, with optional paid support plans that are often more affordable than VMware licensing. This financial advantage is particularly attractive to organizations that are looking to allocate resources efficiently without compromising on efficiency.
- Open Source: Proxmox VE is developed with a strong community behind it, offering transparency and flexibility.
- Unified Platform: Proxmox VE combines virtualization (KVM) and containerization (LXC) into a single platform, simplifying management.
- Scalability: Proxmox VE is designed to allow efficient scaling from small environments to larger deployments without needing additional licensing costs.
- Advanced Features: Proxmox VE includes features like high availability, backup and restoration, and advanced clustering options.
Avail expert migration assistance for moving VMs from VMware to Proxmox V. Get in touch!
How to Plan for VMware to Proxmox VE Migration?
-
Assess Your VMware Environment
Assess the existing VMware setup, making sure to detail all Virtual Machines (VMs) with their respective configurations. Record network settings, storage configurations, and any unique VM requirements. Choosing the right window for migration is also quite important to ensure minimal operational disruptions. Finally, make sure that your hardware meets Proxmox VE’s system requirements.
What to Do:
Inventory VMs: Document all VMs including their configurations, data, and applications.
Evaluate Resources: Ensure your hardware meets Proxmox VE’s requirements.
-
Define Migration Objectives
Set Migration Goals: Determine what you aim to achieve, such as cost reduction, performance improvement, or feature expansion.
Define Success Criteria: Decide how you will measure the success of the migration. For example, VM performance benchmarks, successful application functionality, or user acceptance.
-
Mapping Application Dependencies
Understanding how applications and services interact on VMs is crucial for smooth migration. Tools like application performance monitoring (APM) software can help visualize these dependencies. During migration, it is important to preserve these connections. Plan the sequence of VM migrations carefully to minimize downtime and maintain the functionality of dependent applications. After migration to Proxmox, verify that all dependencies are correctly set up to prevent service disruptions.
-
Backup
Make sure to plan contingencies for data loss and migration failures by backing up all operation-critical data. This allows you to recover data that you may lose due to unforeseen errors.
-
Testing
We strongly recommend testing the migration with dummy VMs before moving on to the actual thing. The process can seem complicated and familiarising yourself with it is the prudent course of action.
How to Manually migrate from VMware to Proxmox VE?
To migrate VM from VMware to Proxmox VE, follow these steps:
-
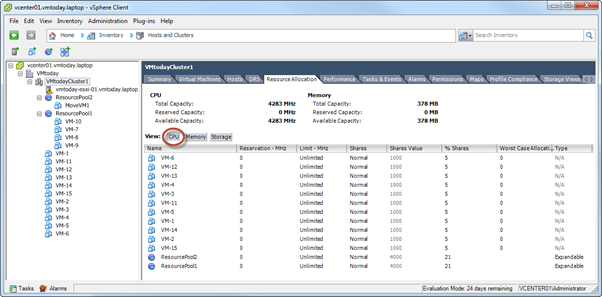
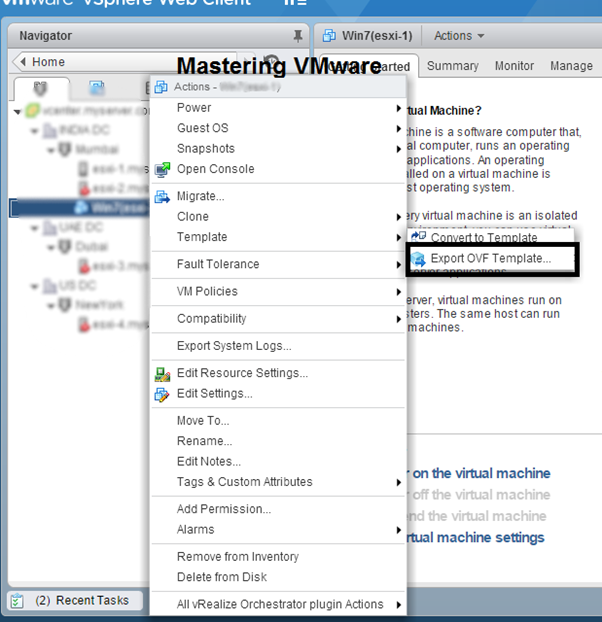
Export VM in OVF format
Open the virtual machine and select File > Export to OVF. Click Save to start the OVF export process.
-
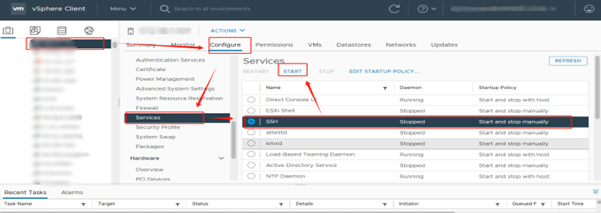
Enable SSH on VMware ESXi
In the vSphere Client follow the steps shown below to enable SSH.
Configure > Services > SSH > START.
-
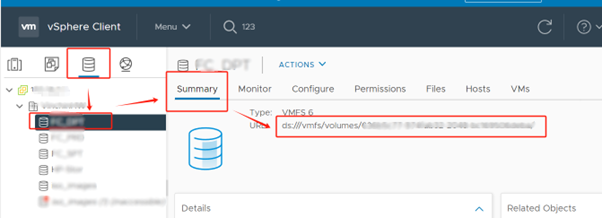
Find the VM storage path
a. Select Volume from Storage and click on Summary to view its path.
b. Using WinSCP/Clonezilla/Putty, connect to the host IP of the VM. Enter the command on the terminal and select Execute after connecting.
-
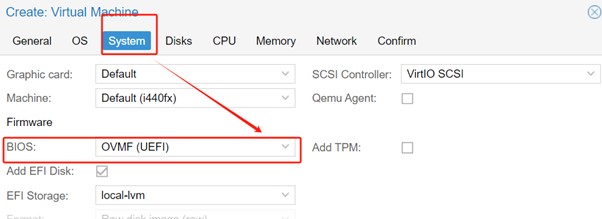
Using the OVF tool for migration
The OVF tool from VMware greatly simplifies the migration process. The tool allows the format for an entire VM disk to be changed from ESXi to Proxmox. It also enables users to pull down the OVF file, a crucial component that embodies VM critical details like CPU cores, memory allocation, and network configuration.
-
Install the OVF tool
a. Install the OVF tool on Proxmox VE.
b. Unzip the file on Proxmox VE using the apt install unzip command.
c. Launch the OVF tool and connect to VMware with the VM name and path. This will create the VM on Proxmox VE../ovftool vi://root@{IP or FQDN of ESXi host}/{VM name} /path/to/export/location
d. Verify the VM details.
-
Import VM on Proxmox
Once exported, navigate to the directory that contains the {VM name}.ovf and matching VMDK file.
qm importovf {vmid} {VM name}.ovf {target storage}
-
Import VM disk
a. Type the command: qm importdisk /var/lib/location/vmname.vmdk {target storage}
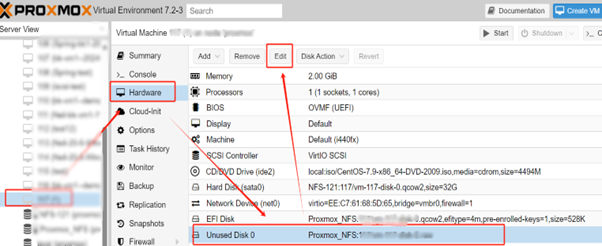
 b. The converted VMDK disk will be automatically displayed as an Unused Disk in the Proxmox VE.
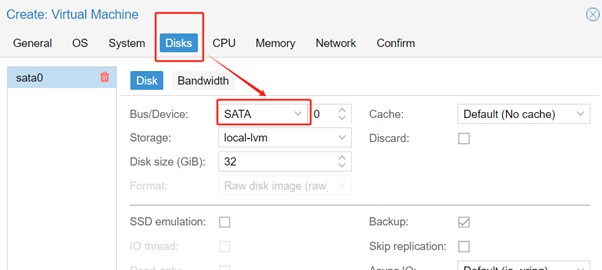
c. Now, click the VM > Hardware > Unused Disk 0 > choose Edit and make sure the bus/device is also SATA
d. Next click on Options > double-click Boot Order. Move the newly attached disk at first and enable it. -
Start the VM
a. To verify that the virtual machine has been successfully transferred, you can now launch it in Proxmox VE.
b. Click the VM, select Console, and then select Start Now.

Apps4Rent Can Help with VMware to Proxmox VE Migration
Based on the steps mentioned above it is clear that VMware to Proxmox migration is a tedious and, at times, complicated process requiring accurate implementation and rigorous planning. A single misstep may cost you dearly. Our team of experts, with their considerable experience in Microsoft Solutions and Proxmox migration, can ensure a smooth transition for you.
At Apps4Rent we offer personalized assistance throughout the migration process, from pre-transition assessment and preparations to execution and post-transition optimizations. Contact our specialists at any time of the day by phone, text, or email for assistance with VMware migration. Regardless of the scale of the transition you are planning on, you can rest easy knowing that our team will have your back through the process!